Loose gutters can lead to serious water damage—learn how to install gutter hangers like a pro! Gutter hangers are essential components that ensure your gutters remain securely attached to your home’s fascia board, preventing sagging, leaks, and water overflow. Without proper support, gutters can pull away from the house, leading to costly repairs and potential structural damage. In this ultimate g
Introduction
Loose gutters can lead to serious water damage—learn how to install gutter hangers like a pro! Gutter hangers are essential components that ensure your gutters remain securely attached to your home’s fascia board, preventing sagging, leaks, and water overflow. Without proper support, gutters can pull away from the house, leading to costly repairs and potential structural damage.
In this ultimate guide, we’ll walk you through everything you need to know about how to install gutter hangers , from choosing the right type to securing them properly. Whether you’re a homeowner looking to tackle a DIY project or a professional seeking expert tips, this guide will help you achieve optimal results and protect your home’s foundation. Let’s dive in!
Improve Structural Integrity and Support
Gutter hangers provide the necessary support to keep gutters firmly attached to the fascia board, even under the weight of heavy rainwater, snow, or debris. Without proper hangers, gutters can pull away from the house, leading to costly repairs. Over time, loose gutters can cause water to seep into your home’s foundation, walls, and basement, creating mold, rot, and other structural issues.
A homeowner in Michigan ignored sagging gutters until one winter storm caused them to collapse under the weight of ice. After installing heavy-duty hidden hangers, their gutters remained secure and functional year-round. This simple upgrade saved them thousands in potential water damage repairs.
For every 10 feet of gutter, aim for a slope of 1/4 inch to direct water effectively. Proper slope ensures water flows toward downspouts, reducing the risk of pooling and overflow.
Prevent Sagging and Water Overflow
Sagging gutters disrupt the slope needed for efficient water drainage, causing water to pool and eventually overflow. This can lead to water damage on walls, windows, and foundations. Additionally, overflowing gutters can erode soil around your home, damaging landscaping and weakening the foundation over time.
A contractor in Texas noticed that homes with properly spaced and installed hangers experienced fewer gutter-related issues over a 5-year period compared to those with poorly supported systems. Homes with improperly installed hangers often required frequent repairs, while those with reinforced systems remained trouble-free.
Install additional hangers near downspouts and corners, as these areas experience higher water pressure and stress during heavy rainfall.
Extend the Lifespan of Gutters
By reducing stress on gutters and preventing damage from improper alignment, hangers help extend the lifespan of your gutter system. Regular maintenance combined with sturdy hangers ensures your gutters remain in top condition for years. Investing in quality hangers upfront saves money on repairs and replacements in the long run.
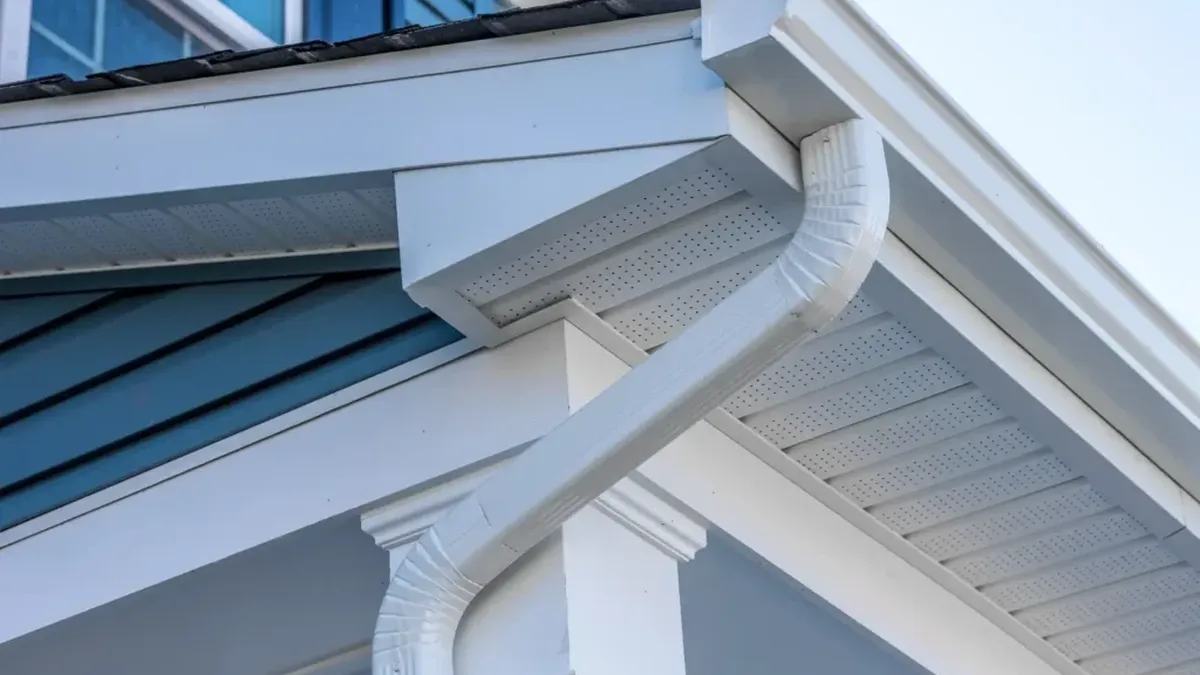
Hidden hangers, when paired with seamless aluminum gutters, offer superior durability and aesthetic appeal. Their sleek design minimizes visibility while providing unmatched strength.
Basic Tools
- Drill: For creating pilot holes and attaching hangers. A cordless drill is ideal for convenience and portability.
- Screwdriver or Impact Driver: To secure screws tightly without stripping them. An impact driver provides extra torque for stubborn screws.
- Measuring Tape: For precise spacing and alignment. A high-quality tape measure ensures accuracy.
- Level: Ensures gutters maintain the correct slope for optimal water flow. Laser levels are particularly useful for larger projects.
- Ladder with Stabilizers: Provides safe access to gutters while protecting them from damage. Always use a ladder stabilizer to prevent dents and scratches.
Different Types of Hangers
- Hidden Hangers: Sleek, modern design that attaches to the front lip of the gutter and hooks onto the fascia. Ideal for seamless aluminum gutters.
- Spike-and-Ferrule Hangers: Traditional option where spikes are driven through the gutter and into the fascia. Best for lightweight gutters but prone to loosening over time.
- Strap Hangers: Wrap over the roof shingles and attach to the gutter. Suitable for lightweight applications but less common today.
- Brackets for Seamless Gutters: Specifically designed for heavy-duty support, these brackets prevent sagging and deformation.
- Snowy Regions: Opt for heavy-duty hangers made from galvanized steel or stainless steel to handle the added weight of ice and snow.
- Humid or Coastal Areas: Choose corrosion-resistant materials like aluminum or marine-grade stainless steel to combat rust and salt spray.
- General Use: Aluminum hangers are lightweight, durable, and cost-effective for most climates.
Safety Gear
- Gloves: Protect hands from sharp edges and debris. Heavy-duty gloves also improve grip when handling tools.
- Safety Goggles: Shield eyes from dust, debris, and falling objects. Essential when drilling or cutting materials.
- Non-Slip Shoes: Prevent slips and falls while working on ladders or roofs. Shoes with good traction are critical for safety.
- Ladder Stabilizer: Keeps the ladder from damaging gutters during installation. Also reduces the risk of accidents by providing stability.
Use stainless steel or galvanized screws and hangers to resist rust and corrosion, especially in humid or coastal climates. These small upgrades significantly enhance longevity.
Step 1: Choose the Right Type of Gutter Hanger
- Pros and Cons of Hidden Hangers vs. Spike-and-Ferrule Hangers
- Hidden Hangers: Provide a clean look, superior strength, and easier adjustments. However, they may require more effort to install and are slightly more expensive.
- Spike-and-Ferrule Hangers: Quick and easy to install but prone to loosening over time due to temperature fluctuations. Best suited for lightweight gutters.
- Selecting Materials Suitable for Your Climate
- In snowy regions, opt for heavy-duty hangers to handle the added weight of ice and snow.
- For coastal areas, choose corrosion-resistant materials like aluminum or stainless steel.
If you live in an area with frequent storms or heavy rainfall, consider adding extra hangers near downspouts and corners for additional support. This prevents sagging and ensures efficient water drainage.
Step 2: Measure and Mark Hanger Placement
- Ideal Spacing for Maximum Support and Durability
- Space hangers every 24-36 inches for standard gutters. For heavy-duty applications, reduce spacing to 18-24 inches.
- Place additional hangers at joints, corners, and downspout connections to reinforce high-stress areas.
- Ensuring a Slight Slope for Proper Drainage
- Use a level to mark points along the fascia board, ensuring a consistent slope of 1/4 inch per 10 feet toward downspouts.
- Double-check measurements before drilling to avoid misalignment.
Skipping the slope measurement can result in water pooling and eventual overflow, leading to water damage. Always verify slope with a level before proceeding.
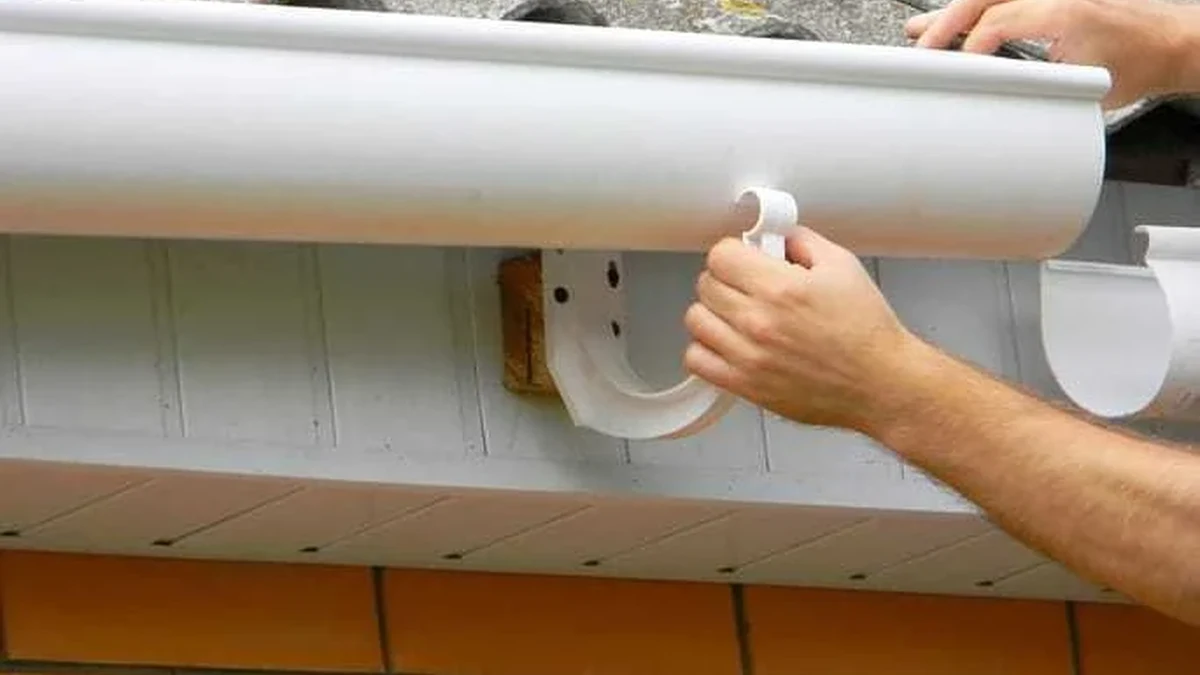
Step 3: Secure the Hangers to the Fascia Board
- Proper Technique for Drilling and Screwing Into Place
- Drill pilot holes into the fascia board to prevent splitting.
- Attach hangers using stainless steel screws for maximum durability. Avoid over-tightening, as this can warp the gutter.
- Checking for Secure Attachment and Weight Distribution
- Ensure each hanger is flush with the gutter and firmly attached to the fascia.
- Test the stability by gently applying pressure to the gutter. It should feel secure and immovable.
If the fascia board is damaged or rotting, repair or replace it before installing hangers to avoid future issues. Rotting fascia boards compromise the entire gutter system.
Step 4: Test & Adjust for Stability
- Run Water Through the Gutters to Check for Sagging
- Use a garden hose to simulate rainfall and observe water flow.
- Look for signs of pooling, misalignment, or overflow.
- Reinforce Weak Spots with Extra Brackets if Needed
- Add additional hangers in areas showing signs of stress or sagging. Pay special attention to corners and downspouts.
Inspect hangers annually for loosening or rusting, and tighten or replace them as needed to maintain optimal performance. Regular maintenance extends the life of your gutter system.
Avoiding Over-Tightening, Which Can Warp Gutters
- Tighten screws just enough to hold the hanger securely without bending or distorting the gutter. Over-tightening can create weak points that lead to cracks or leaks.
Ensuring Proper Spacing to Prevent Sagging
- Uneven spacing can lead to weak points in the gutter system, causing sagging and water overflow. Always follow manufacturer recommendations for spacing based on gutter material and climate.
Checking for Roof and Fascia Board Damage Before Installation
- Inspect the fascia board for rot, cracks, or other damage. Address any issues before installing hangers to prevent future problems. Damaged fascia boards compromise the stability of the entire system.
For multi-story homes, consider hiring a professional to ensure proper installation and safety, as working at heights increases risk. Professionals have the tools and expertise to handle complex installations efficiently.
Conclusion
Installing gutter hangers is a crucial step in maintaining a functional and durable gutter system. With the right tools, materials, and techniques, you can ensure your gutters remain securely attached, preventing costly water damage and extending their lifespan. Ready to get started? Gather your tools and materials today to begin reinforcing your gutters. For complex installations or multi-story homes, don’t hesitate to consult a professional contractor. By following this guide, you’ll enjoy peace of mind knowing your gutters are properly supported and ready to handle whatever weather comes your way.
Frequently Asked Questions
Q1: How far apart should gutter hangers be installed?
Answer: Typically every 24-36 inches, but closer spacing may be needed for heavy-duty applications.
Q2: Can I install gutter hangers myself?
Answer: Yes, with the right tools and precautions, though professional help is recommended for multi-story homes.
Q3: What type of hanger is best for seamless gutters?
Answer: Hidden hangers are ideal for seamless gutters due to their strength and discreet appearance.
Q4: Do I need to replace all hangers if one is damaged?
Answer: Not necessarily, but inspect others for wear and tear and replace as needed.
Q5: How do I know if my gutters need more hangers?
Answer: Look for signs of sagging, pulling away from the fascia, or water pooling.
Gutter Help Across Auckland
Need a hand putting this into practice? My Homes Construct Ltd delivers gutter cleaning, repair and replacement services throughout Auckland, from the North Shore through to South Auckland, with the local knowledge to get the details right the first time.
Get in touch for a free, no-obligation quote. You'll deal with the same registered building company team across your whole project, with quality materials and a workmanship warranty as standard.
When to Call a Professional
The trickiest part of any gutter cleaning, repair and replacement project is often knowing when to stop and call someone in. Warning signs worth taking seriously include recurring problems, damage that keeps spreading, anything involving safety or access at height, and work that touches the structure of your home.
In those situations a professional opinion pays for itself. We're always happy to take a look and tell you straight whether it's something you can manage yourself or a job better left to a registered building company — with no obligation either way.
A Quick Checklist for Auckland Homeowners
Whatever you decide to do next, a few simple principles will save you money and stress on any gutter cleaning, repair and replacement job in Auckland. Act early — Auckland's wet, humid climate turns small problems into expensive ones faster than most people expect. Get it in writing — a clear, itemised written quote protects you and makes comparing options straightforward. Check it's a registered building company — it matters for quality, consent and warranty cover. Ask about the warranty — reputable Auckland tradespeople stand behind their workmanship, not just the materials. Think long-term value, not just the cheapest price — the lowest quote is rarely the best value once durability is factored in.
Keep these in mind and you'll avoid the most common — and most costly — mistakes we see on Auckland properties.
Need Professional Help in Auckland?
My Homes Construct Ltd provides expert gutter and full home-improvement services across all Auckland suburbs. Get a free, no-obligation quote today.